Sunday, October 19, 2014

Oatmeal Chocolate Chip Cookies

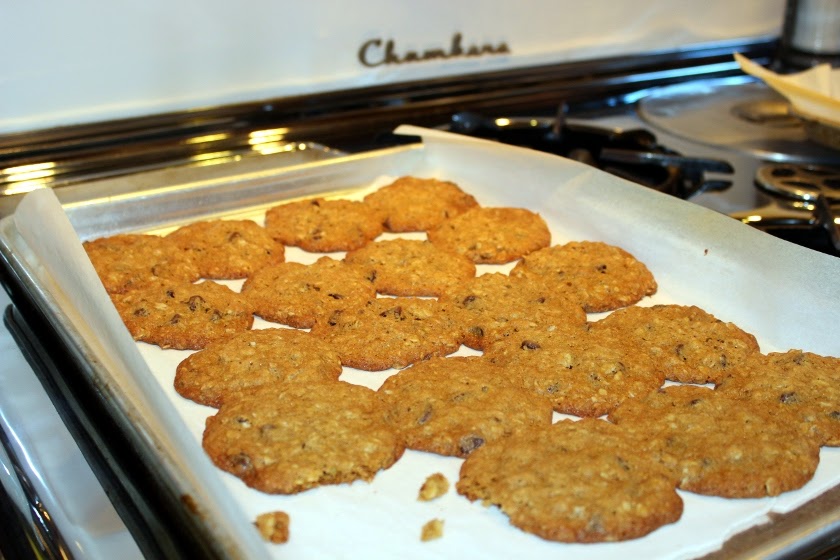
A few weeks ago, my sister-in-law picked up some cookies from a local cookie shop and shared a few with us.  I opted to try the oatmeal chocolate chip and I thought it was a nice combination of oatmeal, chocolate and cinnamon.  I really liked the cinnamon with the chocolate.  As  I usually find with bakery products, the cookie was undercooked to my tastes, so I thought I would see if I could replicate it at home. 


For inspiration, I turned to the 1980 Toll House Heritage Cookbook.


I didn't find an oatmeal chocolate chip recipe, but I did find one for Oatmeal Scotchies.  I didn't have any butterscotch chips at home, so I would have had to substitute chocolate chips anyway.  Plus, I would almost always choose chocolate over butterscotch.  Because it is chocolate.


To change the recipe to what I was looking for, I added a teaspoon of cinnamon to the flour, replaced the orange extract with vanilla and substituted chocolate chips for the butterscotch morsels.  And my mom says I can't follow directions!


chambers 90c stove range
Add caption

Man, these were good!  I couldn't taste the cinnamon as much as in the bakery version, but the chocolate chips and oatmeal are a good match.  Move over raisins, chocolate chips are taking over the oatmeal cookie!

In other news, the weather has been absolutely gorgeous for the last week and the butterflies have been showing up in droves.  We've even had a few migrating Monarchs stop for a visit.  Normally their migration route is a bit west of us, so it was fun to see so many at once.  I managed to catch a photo of one feeding from my bedraggled Mexican sunflower.  This poor flower came up right in the middle of my garden path, so I have been walking around it all summer.  It's about 7 feet tall now and has been blown over twice in storms, but it just keeps on blooming.


Oatmeal Chocolate Chip Cookies (Printable recipe)
adapted from the 1980 edition of the Toll House Heritage Cookbook

Ingredients
2 cups unsifted flour
2 teaspoons baking powder
1 teaspoon baking soda
1 teaspoon salt
1 teaspoon cinnamon
1 cup softened butter
1 1/2 cups firmly packed brown sugar
2 eggs
1 tablespoon water
1 1/2 cups uncooked oats
12 ounces chocolate chips
1 teaspoon vanilla extract

Directions
Preheat oven to 375F.  In a small bowl, combine flour, baking powder, baking soda, salt and cinnamon; set aside.  In a large bowl, combine butter, brown sugar, eggs and water; beat until creamy.  Gradually add flour mixture.  Stir in oats, chocolate chips and vanilla extract.  Drop by slightly rounded measuring tablespoons onto greased cookie sheets (I used parchment paper).  Bake 10 to 12 minutes.

Monday, October 13, 2014

A couple of vintage scores!

Last week I was determined to get the flowerbeds whipped into shape, so I dove head-first into the project.  I bought a flat of pansies plus some perennials and shrubs to add to the landscape, then started ripping out dead plants and weeds.  This, of course, brought on 5" of rain over the last few days, so I haven't been able to plant any of the things I bought.  Since I couldn't plant, I shopped.

Fortunately, my sister suggested we go to our mom's church rummage sale (only to find that our mom had decided not to go!) and a few other places on Saturday, so that took my mind off of my planting woes.

I was the one that introduced my sister to estate sale and junk store shopping, but it turns out that she is much better at it than I am.  She found many treasures on our excursion, but I was beginning to think I was going home empty handed when I finally found a Pyrex Snowflake casserole:


It's in really nice shape, but missing its lid.  As it happens, I had found a lid for a quarter in a thrift shop months ago, but hadn't seen an appropriately sized casserole for sale since.  So yay, a complete casserole dish!  This brings my total Snowflake count up to 3 (well, 3 dishes, 2 lids).  Does that count as a collection?

I really like the space saver Pyrex dishes. More!  I want more!


On my way home from my sister's house, I noticed a sign for an estate sale that I hadn't seen advertised.  The sale was wrapping up, so there wasn't much left, but I found 3 rectangular Pyrex storage containers with plastic lids for $7, plus this little gem for $1:

Because, really, who doesn't need one of these?

I gave it to Farm Boy because he sure does love his weiner.  Dog.  He loves his weiner dog.


Arlo the weiner dog
I'm going to try to find an air plant to put in the little planter.  Between the cats and my regime of forgetfulness and neglect, most houseplants don't stand a chance around here.

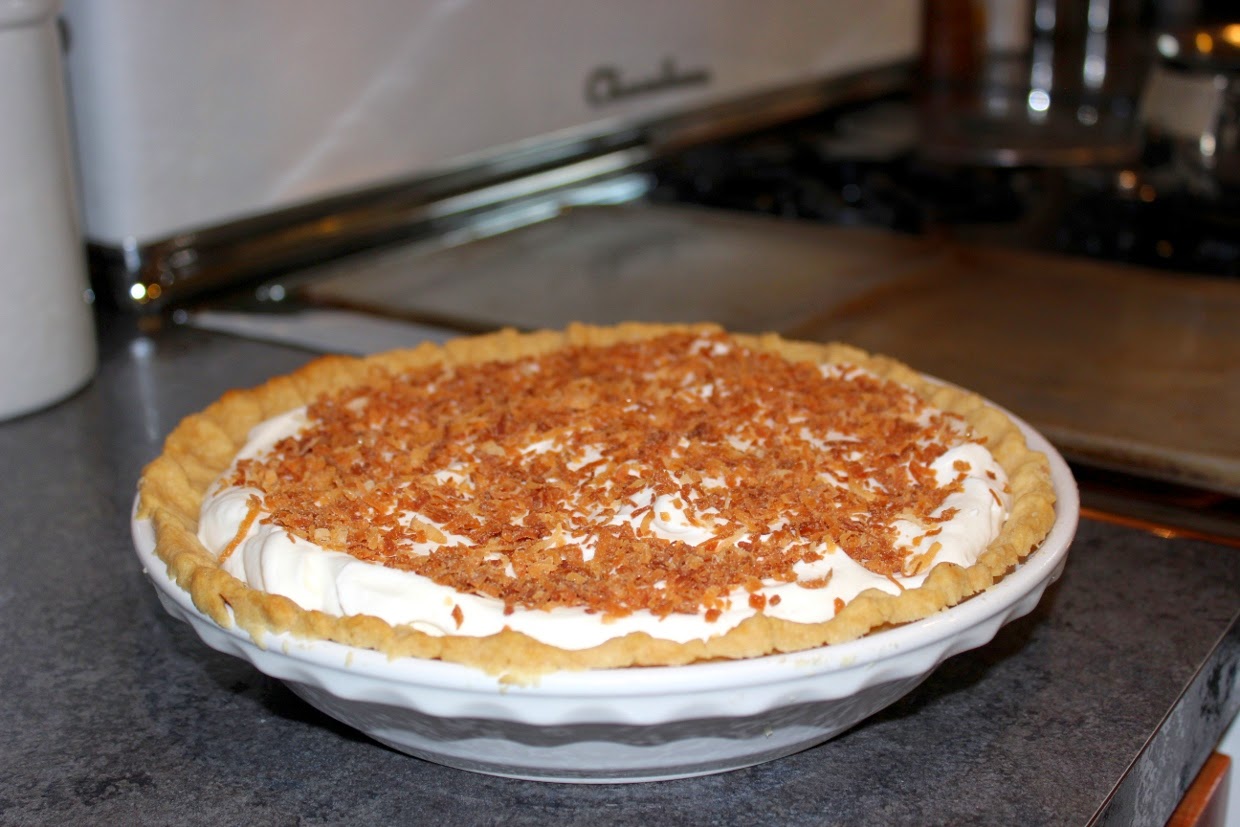
On the cooking front, I didn't do much in the way of vintage cookery this past week.  We had guests over for dinner on Sunday (for Farm Boy's famous ribs - mmmm!) and I made my first coconut cream pie.  I sent the last piece home with one of the guests and then sorely regretted that decision after Monday's lunch. <sigh>


chambers 90c stove range

Wednesday, October 8, 2014

Cinnamon Praline Flan

As a certified estate sale junkie, I've run into flan pans at sales for years, mostly in 1970s shades of orange, avocado and harvest gold.  Despite my apparent desire to own every baking utensil in the world, I could never figure out how you used them to make a custard-like flan, so I just ignored them. Until the day that I read you are supposed to bake a sponge cake in them, then fill the depression with all sorts of deliciousness.  It's effectively a bowl made of cake.  I had to have it.

So began my search for a flan pan.  Alas, much like my search for a backup cookie spatula, flan pans disappeared from estate sales as soon as I started looking for one.

Desperate desires call for desperate measures.  Hello, eBay.


I didn't have a recipe to go with my pan, so I borrowed one from a picture of an avocado colored pan I found online.  Unfortunately, those pans must be bigger than mine because my flan runneth over.  That just meant that Farm Boy and I had a little cake to snack on before time for Tea and Crumpets with my mom.

chambers 90c stove range

For the topping, I used the caramel frosting recipe from my jam cake attempt, adding a little cinnamon to the frosting and some toasted pecans on top of the cake.

Results:  Only one lonely piece came home with us after Tea and Crumpets, so I call that a success!  While I need to either scale down the cake or find a different recipe, that topping is a keeper.  For the next round, I will fill it with custard and top it with fruit.  If it has fruit, it's a health food, right?

Cinnamon Praline Flan (Printable Recipe)

Flan
from the back of a NordicWare flan pan

Ingredients:
3/4 cup sugar
1/4 cup butter
3 egg yolks
1 1/4 cup sifted cake flour
2 teaspoons baking powder
1/2 teaspoon salt
1/2 cup milk
1/2 teaspoon vanilla extract 

Directions: 
Beat butter, sugar and yolks until fluffy. Sift dry ingredients; add alternately with flavoring and milk; blend well. Pour into greased and floured flan pan. Bake at 350F about 25 minutes. Remove to rack and cool completely.

Cinnamon Praline Topping
 adapted from the 1968 edition of Everybody's Favorite from the Minnesota Catholic Daughters of America

Ingredients


3 tablespoons butter
1/3 cup cream
1 teaspoon vanilla
2/3 cup brown sugar
1/8 teaspoon salt
3/4 teaspoon cinnamon


toasted pecans


Directions

Mix butter, cream, brown sugar, salt and cinnamon in a sauce pan.  Boil constantly until it reaches soft ball state.  Remove from heat, add vanilla.  Cool slightly, then beat until of spreading consistency.

Arrange toasted pecans on top of baked flan.  Pour caramel over pecans and allow to cool before serving.

Monday, October 6, 2014

Warm Bacon Salad Dressing

While trying to figure out what was considered a French dressing in the 1940s for another recipe (it's a vinaigrette with a little paprika added for color, in case anyone is wondering), I came across a blurb about making a warm bacon dressing for salad in Cooking on a Ration (1943). I have had wilted spinach salads before, but it never occurred to me that the bacon dressing might be good on something besides spinach.  Which for the purpose of this post really doesn't matter because spinach was what I had on hand.  But still, it made an impression.  Clearly I am easily impressed!

Cooking on a Ration


It's even autographed!
The introduction to this book really intrigues me because the author bemoans the fact that everyone will have to learn to cook now that they won't be able to find or afford convenience foods.  I had no idea that processed foods were so prevalent prior to 1943.


The spinach salads I've made before involved hard-boiled eggs, but I was low on eggs and decided to just go with simply spinach and some red onions cooked lightly in the bacon fat.   I really did follow the directions to just "add a dash of sharp vinegar, a little brown sugar, a shake of salt and pepper" instead of measuring, then I poured the dressing over the spinach in a mixing bowl and tossed it until it was slightly wilted, and topped it with the bacon.


This was delicious!  And a nice, simple side to make while the rest of supper was baking.  I will definitely make this dressing again and I might even branch out to using it on warm potatoes or Romaine lettuce.  If, that is, I can conquer my fear of non-crispy lettuce.  Flaccid lettuce just seems so wrong, but maybe bacon can save it.

Warm Bacon Salad Dressing (Printable Recipe)
from Cooking on a Ration, 1943


Ingredients:
2 slices bacon
1/4 of a red onion, sliced (optional)
dash of sharp vinegar (I used about 2 tablespoons of apple cider vinegar)
a little brown sugar (about 1 tablespoon)
salt and pepper to taste


Directions:
Fry the bacon until crispy.  Remove and chop coarsely.  If using the onion, fry it in the bacon fat in the pan until soft.  Remove the pan from the heat and add the remaining ingredients, stirring well.  Toss with the salad ingredients of your choice and top with the chopped bacon.


Sunday, October 5, 2014

Pork Chops en Casserole

Today's contender for the title of Cookbook with the Least Catchy Name is The Victory Binding of the American Woman's Cook Book, War Time Edition (1943). 


This is a huge, encyclopedic cookbook with a wartime rationing supplement at the back of the book. Yes, I admit it.  I am a sucker for anything with information on rationing.


I had three pork chops, so I halved the recipe and decided to mix things up (per the suggestion at the end of the recipe) and use one sweet potato and two apples.

chambers 90c stove range

It's not terribly photogenic, but the pork chops turned out very tender and moist.  The apples and sweet potatoes were a nice combination, but I'm not sure about the milk.  By the time it was finished baking, the milk had separated into whey and "chunky stuff".  I would use this method again, but instead of milk I think cream with a splash of applejack or perhaps just some chicken stock would be good.

Pork Chops en Casserole (Printable Recipe)
from The Victory Binding of the American Woman's Cook Book, War Time Edition (1943)

Ingredients
6 pork chops
6 sweet potatoes
salt and pepper
1/2 cup brown sugar
1 to 2 cups milk*

Directions
Place a layer of sweet potatoes, sliced crosswise, in a greased casserole, dust with salt, pepper and a little brown sugar;  continue the layers until the casserole is about two-thirds full.  Heat the milk and pour it over the potatoes; it should just cover them.  Place the pork chops on top of the potatoes, cover and bake (at 350F) for an hour, then remove the cover and season with salt and pepper.  Leave the cover off and cook until the chops are tender and nicely browned on top.

Four tart apples, pared, cored and cut into eighths, used in place of the sweet potatoes, make an excellent casserole dish with pork chops.

*I recommend cream or broth instead, to prevent the milk from separating.

Friday, October 3, 2014

Meatloaf

I pulled The Campus Survival Cookbook off the shelf this week because I wanted to make a meatloaf, but I was a little short on time and energy. This recipe looked simple enough.


I'm not sure how many things I've made from this cookbook, but for some reason I'm really fond of it. It has really good basic instructions and recipes for beginners, 1970s style. 

The Campus Survival Cookbook, 1973

It contains some funny written tidbits and has some cute illustrations scattered throughout the pages, too.


Boy! Can you cook!


I once saw the follow-up, The Campus Survival Cookbook 2, at a library book sale for a quarter and passed it up.  I still regret that moment of cheapskatery. 


chambers 90c stove range

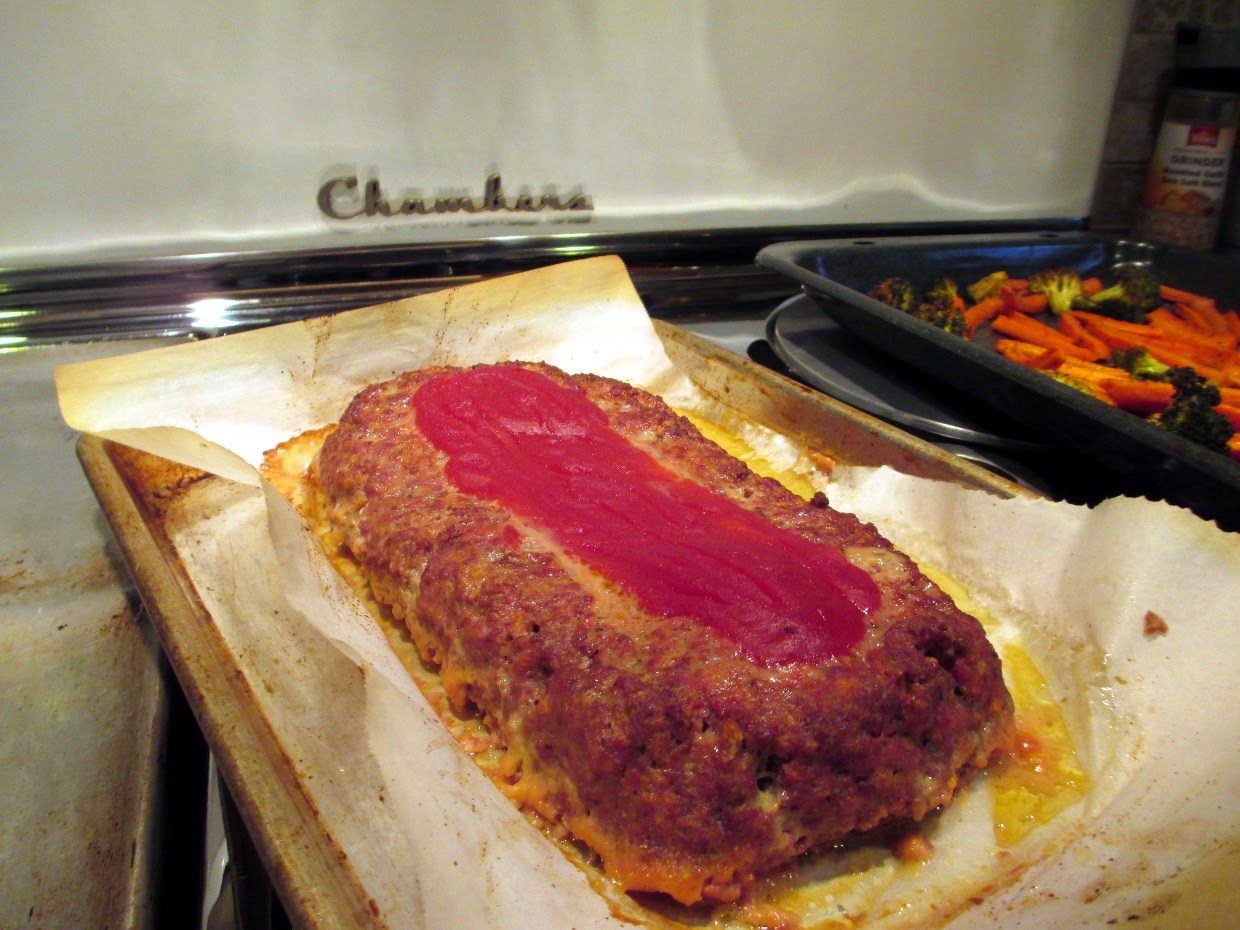
I halved the milk because it seemed like a lot, but otherwise I followed the recipe as written.  It turned out fine (good texture, flavor), but it was a little bland, in my opinion.  I think the addition of some bacon, minced onions or bell pepper would help it quite a bit. 


Meat Loaf (Printable Recipe)

from The Campus Survival Cookbook

Ingredients
1 1/2 pounds ground beef
3 tablespoons chili sauce or barbecue sauce
3 slices bread, torn up small
1/2 cup milk
1 egg
2 teaspoons salt
1/4 teaspoon pepper
1/4 teaspoon garlic powder
1 tablespoon Worcestershire sauce
1 tablespoon ketchup

Directions
Preheat oven to 350F.

Measure everything except first 2 ingredients into pan or bowl. Beat with a fork to mix well.

Add ground beef. Squish everything together with hands until well mixed.  Pat down until smooth.  Cover with chili sauce or barbecue sauce.

Bake at 350F for one hour.  Remove from oven.  Pour off excess fat before serving. 

Monday, September 29, 2014

September 7th Cake

While looking through Maida Heatter's Book of Great Chocolate Desserts, I stumbled across September 7th cake. We have several September birthdays in the fam, so I jokingly said it was too bad no one's birthday was September 7th.   They decided it was close enough and requested it for the party.  Who came up with this crazy idea?  Oh, I think I did...


After some initial terror, I read through the recipe (all four pages of it) and decided I could make it. (I think I can! I think I can!) After the third reading, I realized that there is very little "cake" in this cake. It consists of two thin layers of a flour-less chocolate cake, with a filling of stabilized whipped cream frosted with more whipped cream mixed with 1/2 pound of semi-sweet chocolate and some coffee.  How could that possibly be bad?

So, full of confidence, I set about making the cake.  About 10 minutes into the baking, I smelled something burning.  I opened the oven and it didn't look too bad, so I turned it down to 350 and crossed my fingers.  Alas, it was a lost cause.  The cake was not only burned on the edges, but it the smell had permeated the entire cake (as well as the house).  I tried to save it by cutting off the burned parts, but by the time I got the first layer to something that looked cake-like, it was about 1/4" thick and 6" in diameter.  

At this point, the swearing commenced.


Oh the humanity! 
Right after I threw the whole mess in the trash, Farm Boy called and said a friend had invited us out to dinner.  Which was good because it meant that I didn't immediately try again.  When we got home, I started over, but inserted a new first step into the recipe:  Pour a glass of wine. 

Aaaaaahhhh

I lowered the oven to 350F this time (it may have even been slightly lower - see wine above).  This time instead of smelling like a coffee pot that has been on the burner too long, it smelled like chocolate. So much better.

Success!

The recipe gives very detailed directions on how to apply the icing with a pastry bag.  I decided that my sanity was more important than trying to pipe whipped cream icing in my warm kitchen, so I slapped it on with a knife and brushed it with a comb.  It's not as glamorous, but it was a lot faster.


This cake, as promised, is delicious, light and airy (and rich).  I would describe it as like eating chocolate air, but my favorite description of the day was, "It's like eating baby angels!". 


September 7th Cake (Printable Recipe )
from  Maida Heatter's Book of Great Chocolate Desserts

Layers
6 extra-large eggs, separated
3/4 cup sugar
1/4 cup plus 1 tablespoon unsweetened cocoa powder
1/4 teaspoon salt

Filling
3/4 teaspoon gelatin
1 1/2 tablespoons cold water
1 1/2 cups heavy whipping cream
1/3 cup powdered sugar
3/4 teaspoon vanilla

Icing
8 ounces semisweet chocolate
1/2 stick butter
1 tablespoon instant coffee powder
1/4 cup boiling water
2 cups heavy whipping cream
1/4 cup powdered sugar
1 teaspoon vanilla extract

Layers:

Preheat oven to 350F degrees (original recipe calls for 375F). Butter two 9-inch round layer-cake pans. Line the bottoms with rounds of wax paper or baking-pan liner paper cut to fit. Butter the paper and dust the inside of the pan all over with flour, invert the pans and tap to shake out excess flour.

In the small bowl of an electric mixer beat the egg yolks at high speed for 5 minutes until they are light lemon-colored. Add about half (6 tablespoons) of the sugar (reserve the remaining half) and continue to beat at high speed for 5 minutes more until the mixture is very thick and forms a wide ribbon when the beaters are lifted.

Add the cocoa and beat on lowest speed, scraping the bowl with a rubber spatula, and beating only until the cocoa is completely mixed in. Remove from the mixer and set aside.

Add the salt to the egg whites in the large bowl of the electric mixer. With clean beaters, beat at high speed until the whites increase in volume and barely hold a soft shape. Reduce the speed to moderate while gradually adding the reserved sugar. Increase the speed to high again and continue to beat until the whites hold a definite shape when the beaters are raised or when some of the mixture is lifted on a rubber spatula—they should not be stiff or dry.

In several additions, small at first (about a large spoonful), fold half of the beaten whites into the chocolate mixture. Then fold the chocolate mixture into the remaining whites. Do not handle any more than necessary.

Turn half of the mixture into each of the prepared pans. Gently smooth each layer.

Bake for 30 to 35 minutes or until the layers spring back when lightly pressed with a fingertip and begin to come away from the sides of the pans.

Remove from the oven. With a small sharp knife carefully cut around the sides of the layers to release them. Cover each layer with a rack, invert pan and rack, remove pan, peel off the paper lining, cover layer with another rack, and invert again to let the layers cool right side up.

While they are cooling the layers will sink and the sides will buckle and look uneven but don't worry. That is to be expected in this recipe. The filling and icing will cover them and they will be light, moist, and delicious.

When the layers are completely cool, prepare a flat cake plate as follows. Cut four strips of wax paper, each one about 10x3 inches. Place them around the outer edges of the plate.

Place one layer upside down on the plate and see that the wax paper touches all the edges of the cake.

Filling:

Sprinkle the gelatin over the water in a small heatproof cup. Let stand for 5 minutes. Place the cup in a small pan containing about an inch of hot water. Set over moderate heat and let stand until the gelatin dissolves, then remove from the hot water and set aside.

Reserve 2 or 3 tablespoons of the cream and place the remainder in the small bowl of an electric mixer (if the room is warm the bowl and beaters should be chilled). Add the sugar and vanilla. Beat only until the cream has increased in volume and holds a soft shape. Then quickly stir the reserved tablespoons of cream into the warm, dissolved gelatin and, with the mixer going, pour the gelatin all at once into the slightly whipped cream and continue to beat. The cream should be beaten until it is firm enough to hold a shape.

Place the whipped cream on the bottom cake layer. Carefully spread it evenly. Cover it with the other layer, placing the top layer right side up. Place in the refrigerator and prepare the icing.

Icing:

Break up or coarsely chop the chocolate and place it in the top of a small double boiler over hot water on moderate heat. Add the butter. In a small cup dissolve the coffee in the boiling water and pour it over the chocolate. Stir with a rubber spatula until the mixture is melted and smooth. Remove it from the hot water and transfer it to a medium-size mixing bowl.

Let the chocolate cool to room temperature, stirring occasionally.

When the chocolate has cooled, place the cream, sugar, and vanilla in the small bowl of the electric mixer. Beat only until the cream holds a soft shape. It is very important that you do not whip the cream until it holds a definite shape; that would be too stiff for this recipe and would not only cause the icing to be too heavy but would also give it a slightly curdled appearance. Everything about this cake should be light and airy, and the chocolate will stiffen the cream a bit more.

In two or three additions fold about half of the cream into the chocolate, and then fold the chocolate into the remaining cream.

Remove the cake from the refrigerator.

If you have a turntable for decorating cakes or a lazy Susan, place the cake plate on it.

Use as much of the icing as you need to fill in any hollows on the sides of the cake—use a spoon or a metal spatula—and then smooth the icing around the sides. If you are working on a turntable, rotate it while you hold a small metal spatula against the sides to smooth the icing.

Now the cake can be finished in one of two ways (depending on whether or not you want to use a pastry bag). You can either use all of the icing to cover the top very thickly, or you can spread it very thinly and reserve about 3 cups of the icing and decorate the top with a pastry bag and a star-shaped tube.

Place the icing on the top and spread it smoothly. Then spread the sides again to make them neat.

To decorate the top, which will be completely covered with rippled lines of icing, fit a 15-inch pastry bag with a #6 star tube and fold down a deep cuff on the outside of the bag. Place the icing in the bag. Unfold the cuff. Close the top of the bag. To form the icing lines, begin at the edge of the cake furthest from you, at the middle of the edge. Squeeze an inch or two of icing out of the tube in a line coming toward you. Continuing to squeeze and without stopping the flow of the icing, move the tube back away from you over about half the line you have just formed, making another layer of icing on the first. Still without stopping the flow of the icing, bring the tube toward you again and make another 1- to 2-inch line, then double back over half of this distance again. Continue across the whole diameter of the cake. The finished line will be along the middle of the cake. Make another, similar line to one side of the first, touching it. I find it easier to work from the middle—one side all the way and then the other side all the way to entirely cover the top of the cake with these wavy lines.

Remove the strips of wax paper by pulling each one out toward a narrow end.

Refrigerate for at least 6 hours or overnight and serve cold. To slice this cake without squashing it, insert the point of a sharp knife in the center of the cake. Then cut with an up-and-down sawing motion.