Tuesday, June 30, 2015

Chocolate Coconut Icebox Cookies

I found this small cookbook at a local junk store a few months ago. I liked both the cover and the inside photos showing all the mid-century bakeware, so when I saw the twenty-five cent price tag, I decided to go for it.  I'm sure the shop owner appreciates my spendthrift ways!

Learn to Bake... You'll Love it!  General Foods, 1947
While leafing through a few old cookbooks* last weekend, I noticed the coconut variation of the Chocolate Icebox Cookies recipe.  Chocolate and coconut...  count me in!


I used the stand mixer to make these and I think I may have over-mixed them a bit.  The cookies in the cookbook photo are glossy, while mine are not.  They also turned out cakey and very firm.  The flavor was very good, but I think the texture may be off .  I've done this with brownies before, too.  The next time I make them, I will try mixing them by hand, as the recipe instructs.


chambers 90c stove range

And yes, I will make them again.  They were a big hit with my tasters, who described them as brownie cookies.  Once cooled, the first thing that hits you is brownie, followed by a pronounced coconut flavor.  I think if I get the texture right next time, they will be even better. 


*Yes, I have some exciting hobbies!

Chocolate Coconut Icebox Cookies (Printable Recipe)
from Learn to Bake... You'll Love It!, General Foods, 1947
Ingredients
  • 2 cups sifted cake flour
  • 1 3/4 teaspoons baking powder
  • 3/4 teaspoon salt
  • 1/2 cup soft butter
  • 3/4 cup sugar
  • 1 egg
  • 2 squares melted unsweetened chocolate
  • 1/2 teaspoon vanilla
  • 3/4 cup shredded coconut
Directions

Sift together the flour, baking powder and salt.
Combine butter, sugar, eggs, chocolate and vanilla, beating with a spoon until blended; add coconut.  Add flour gradually, mixing well after each addition.
Divide dough into halves; shape into 2" diameter rolls and wrap in waxed paper.  Chill in refrigerator until firm.
Before slicing, let rolls stand at room temperature for 1/2 hour or until soft enough to dent when pressed with a finger.   Cut into 1/8" slices, using a sharp knife.
Bake on ungreased baking sheets at 350F about 10 minutes.


Monday, June 15, 2015

Brownies in a Cornbread Skillet

For years I saw these cast iron cornbread skillets at estate sales, but I always passed them by. I thought they would probably make good, crusty cornbread, but I could tell that they were significantly smaller than the skillet I normally use for cornbread and I didn't think I could be bothered to make half a recipe*. But then I stumbled across a photo of brownies made in one of these pans. Since the edge pieces are my favorites, I swooned at the idea of having an entire batch of edge pieces. I also swore at myself a little because I hadn't thought of the idea on my own. It seems so obvious in hindsight.

So I began to watch for a cornbread skillet at estate sales, junk stores and thrift shops. Months passed. Nothing. Nada. Zip. Zilch. And then last Friday I stepped into the kitchen of an estate sale I had judged as "meh" by the photos and there it was, just waiting for me, and sporting a six dollar price tag (on 25% off day, no less). I shoved the woman in front of me out of the way and grabbed it.  Sorry, Mom.

chambers 90c stove range cast iron cornbread

I'm cheating a little here and not using one of my cookbooks, but this is my favorite brownie recipe.  It makes a dense, fudge-like brownie, not a cakey brownie.  I've been making them for years, so long that I'm not sure where the recipe originally came from.

These always seem to take the long amount of baking time for me, but you should probably start checking at the early time.  These should be dense and moist and overbaking them is not a good thing.  I take them out when I feel some resistance when I touch the top, but before they would be considered firm.  They will continue to cook for a bit in the pan.

chambers 90c stove range cast iron cornbread
Nothing but edge pieces, baby!

Fudge Brownies in a Cornbread Skillet (Printable recipe)
Ingredients
  • 1/2 Cup melted butter 
  • 1 Cup sugar 
  • 1 egg
  • 1/4 Teaspoon salt 
  • 1/4 Cup unsweetened cocoa 
  • 1/2 Teaspoon vanilla 
  • 1/2 Cup + 2 Tablespoons flour 

Directions
Preheat oven to 350°F. Place a small piece of butter in each of the skillet wedges.  Place skillet in the oven to melt the butter.  When melted, swirl skillet around to grease each section.

In a large bowl, combine the melted butter and sugar with a wooden spoon. Add the eggs and beat until the mixture is fluffy and emulsified. Add the salt, cocoa and vanilla. Stir well. Add the flour and stir just until flour is incorporated. Spoon the batter into each section of the greased pan and spread to the edges. Bake at 350° for 15 to 25 minutes. Remove from oven and cool for 20 to 30 minutes.  Run a knife around the edge of each section, then invert onto a plate.

To make a 9x13" pan of brownies, double the ingredients and bake for 25 to 35 minutes.

*Farm Boy was kind enough to point out that I simply need to get two of the pans! 

Monday, June 8, 2015

Crusty Blackberry Cobbler

Farm Boy is a certified blackberry aficionado, so when we moved to the country one of our first projects was to plant blackberries.  We don't have a huge number of plants, but they are pretty productive.  Each year we usually get enough for fresh eating, a few cobblers and a gallon or two of blackberry wine.


5 pounds of berries in two days!

My go-to cobbler recipe is the shortcake cobbler from the 1950 Betty Crocker's Picture Cook Book, but since we had so many berries, I wanted to try to make a bigger cobbler with more of a pastry crust than the shortcake.  I turned to my trusty friend, The Southern Living Cookbook (1995).  I was going to say that technically this book isn't vintage, but I suppose at twenty years old it might be.


This is a great cookbook.  I can't think of anything I've tried from it that flopped.  There is a newer edition, but I prefer this one.


Since the recipe was for peach cobbler, I decided to go with my normal blackberry cobbler filling recipe from the Betty Crocker book, but scale it up to the size of the peach cobbler.


The one problem I have with the Betty Crocker recipe is that it calls for all that water.  When the blackberries cook they release a lot of juice, so if you add a cup of water, it makes for a very thin, runny cobbler.  I usually just add a tablespoon or two for my regular cobbler.  I scaled up to a quarter cup for the big cobbler and I thought it was a little runny.  My taste testers liked the extra juice.

Since I seem to have lost my pie crust mojo, I am going to take the coward's way out and just call for a crust for a double crust pie.  Trust me, you don't want any pie crust making hints from me, unless you enjoy placing your pie crusts directly into the trash.

chambers 90c stove range
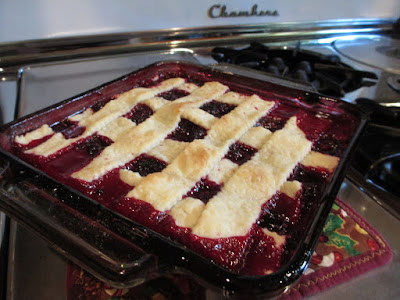
Hot berry deliciousness
The directions calls for weaving the crust into a lattice design, but dipping my fingers into a pan that just came out of a 475F oven didn't seem like a good idea, so I skipped the weaving part.  Again, coward.  I do not have asbestos fingers!

chambers 90c stove range
Yay for leftover pie crust and pie crust cookies!


Crusty Blackberry Cobbler (Printable Recipe)

Ingredients

Pastry for double-crust pie

8 cups blackberries
2 cups sugar
3 Tablespoons cornstarch
1/4 cup water
1/2 Tablespoon butter
1/2 teaspoon cinnamon

Directions

Preheat oven to 475F.  Lightly butter an 8-inch square pan.

Combine the first 4 ingredients in a large saucepan, stirring well.  Cook over medium heat, stirring occasionally, until the mixture has come to a boil and thickened slightly. Set aside to cool.

Roll half of pastry to 1/8" thickness.  Cut into an 8-inch square.  Spoon half of berry mixture into the prepared pan. Dot with butter and sprinkle with cinnamon. Top with pastry square.  Bake for 12 minutes or until lightly browned.

Spoon remaining berries over baked pastry square.  Roll remaining crust to 1/8-inch thickness.  Cut into 1-inch strips.  Arrange in lattice design over berries.  Bake an additional 15 to 18 minutes or until browned. 

Serve warm with vanilla ice cream.